Using Cyanoacrylate Glues and Other Adhesives
 There are many different glues that are used in the construction of model airplanes.
Probably the most popular glue in use today are cyanoacrylates also known as CA. Other glues
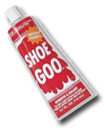
include those in the epoxy family, aliphatic-resin glues, and rubber-cement-style glues such as 'Shoe Goo'.
So which glue is best? There is no simple answer to this question as each has features that make it best for some applications.
CA glues are probably the number one choice for most builders. These glues cure fast, hold parts together well, come in a variety of viscosities (thickness). There are liquid, spray-on 'accelerators' that allow many CA bonds to cure nearly instantly. And even special formulas for use on foam (as most CA glues 'attack' or dissolve foam such as EPS or EPP).
CA glues appear to be the 'one-and-only' glue to use... but, the fumes created when curing can be a little hard on your respiratory system, and some people are just rather allergic to the stuff (including me). Read more about that here: 'CA Sensitivity'. Using the wrong formula for a particular application can make very weak joints, and for large areas it can cure before you get the parts together, and worse yet, you have very little time to reposition parts as you glue them. If you use too much accelerator, the glue will be brittle and break under load or vibration. And sometimes, more often than not, CA will form an instant bond as soon as the parts touch, including your fingers as 'parts'.
CA glues are more expensive than other adhesives, but if you use it sparingly, a little CA will go along way. When using CA, choose the right viscosity for the right application. Thicker CA glues will form gaps and have a long curing time, sometimes hours (like other 'traditional' glues). The thicker the CA is, the slower the glue will cure. Thin CA, similar to the same viscosity of water can be used very sparingly on joints and sometimes it's a great way to 'tack' the part in place until you can position the other parts. It will also seal balsa and other model woods by soaking into the grain, which is particularly useful when painting wooden parts.
ALWAYS use CA glues with plenty of ventilation and use it properly with as little kicker as you need to set it and it will work for almost any application. Acetone will clean up some over-spill or other places, such as your fingers. Remember that Acetone fumes are also bad to breathe, so always try to use in adequate ventilation.
Are CA glues worth the extra expense and trouble to use? Most modelers would probably answer yes as you can build an entire airplane in a single weekend where once it took weeks to build. No more clamping, weighting down wings, tons of T-pins, and waiting, waiting, waiting for the glue joints to cure. CA is cheaper when you buy it in larger quantities, but it doesn't last forever, so buy what you think you will need. You can extend CA glue shelf-life by storing a tightly-sealed bottle in the refrigerator.
Epoxy is another family of glue that is used when you need a lot of strength in a joint. Epoxy doesn't 'dry' in the normal sense, as instead, these glues cure chemically by adding a catalyst. Because of this, epoxies are based in two parts, one part resin, and one part catalyst. They cannot be used in a high-heat situation but are impervious to almost anything after they cure, making epoxy ideal for use around motor mounts and any part of the airplane that might come in contact with raw fuel or water. Acetone is a workable solvent that can used before the epoxy cures for your messy workbench, your pants, and your fingers. After epoxy cures there isn't much that will dissolve or clean up unneeded or spilled epoxy glue.
You can buy epoxy in several formulas from 3-minute to 24-hour or longer curing time. The only real difference is the amount of resin catalyst used. Part A is usually the resin and part B will be the hardener or catalyst. The catalyst is what governs the cure time. The rule to remember about epoxy is the faster curing, then the more brittle it will be later. I always use the longest curing time I can tolerate as I'll probably get a longer lasting glue joint. You can thin epoxy with rubbing alcohol and use a brush to 'paint' it on a joint as well. Alternately, you can use it to join and fill a gap, but it holds much better in the tiniest of gaps. (Don't depend on the glue to make up for sloppy building habits!)
The key to mixing epoxy is to try to get the mix of resin to hardener at 50:50. Equal parts of part A and part B will produce a much better result. Otherwise, sometimes, if not enough hardener is used, the epoxy won't cure at all and it will be soft to the touch (and smelly & sticky too). When epoxy cures, sometimes the glue will get VERY warm during the curing process. Don't be alarmed, the heat is normal and actually is a good indicator of a good mix of the two parts.
About aliphatic-resin glues: A good aliphatic-resin is probably the best to use if you only have one glue and have wood-to-wood bonds. Titebond and Sigment are two of the brands that are available in hobby shops, hardware stores, or even grocery stores. These aliphatic-resin-based glues have been especially formulated for use in model building but plain, old Elmers white glue works very well too. These aliphatic glues are also known as yellow carpenters glue.
The only place these glues fall short is speed. If you have to have your joint bonded right away then aliphatics aren't the glues you should use as they can take
about 24 hours to fully cure. The second problem with them is that the joints must be tight fitting and should be clamped until the glue sets. If you can live
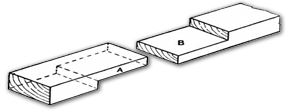
with this situation, then these glues will give a very strong joint. A scarf-joint glued and clamped this way is stronger than the original piece making it ideal
for joining spar stock.  My favorite trick when gluing foam wings with balsa or other woods is to use aliphatic-resin glue with water to about the consistency of heavy cream.
Brush that solution in a thin coat on both the foam core and the sheeting. Let it dry overnight then iron it on to the wing surface using any household iron.
I start with the cotton setting then adjust it as needed to get it to stick down. Experiment just a bit on scrap until you find the right heat range.
I also use it to laminate three pieces of 1/16 sheet cross grain to make very stiff
and light 3/16 sheets for solid stabs and other parts that need to be cut out of sheet. This is like substituting plywood, but it is much stiffer and stronger.
I also use it to laminate wing tips. Make a mold out of thin plywood, cut to shape and layer 1/32 strips around the form, first soaking them in ammonia and water, then wetting them with white glue. Cover the form with wax paper and build up several layers around the form. After it is built up to the thickness you need add a strip of wax paper and tape it tight, form fitting with masking tape let it dry about 2 days before you remove it from the form. The result will be very light and strong. Finish by cutting it to fit and sand to final shape. I also use it to add fuselage doublers in a sheet built fuselage. Brush on a thin coat then position the parts and weight them down until the glue cures (overnight).
Here is a trick I use to keep the parts from shifting while I handle them. Just before I glue them together, I put 2 or 3 small spots of CA glue on one piece then join the parts. Hold them together for a few seconds and they will never move while you add the weights to hold them down. I use 2 quart freezer bags filled with damp sand for weights. If I need more weight I use 2 bags.
Do you have some of your own tips about gluing or related topics you'd like to tell to others? I'll post them in the Articles section if you care to share.
